To add a new logo:
1. Save the image file as either a PNG or JPEG
2. Copy the image into the image folder by following this path: c:drive > inetpub > wwwroot > BusPlannerWebSuite > Applications > BusPlannerWeb > Content > images
3. Once you have completed the above steps, log in as a Professional User on the website
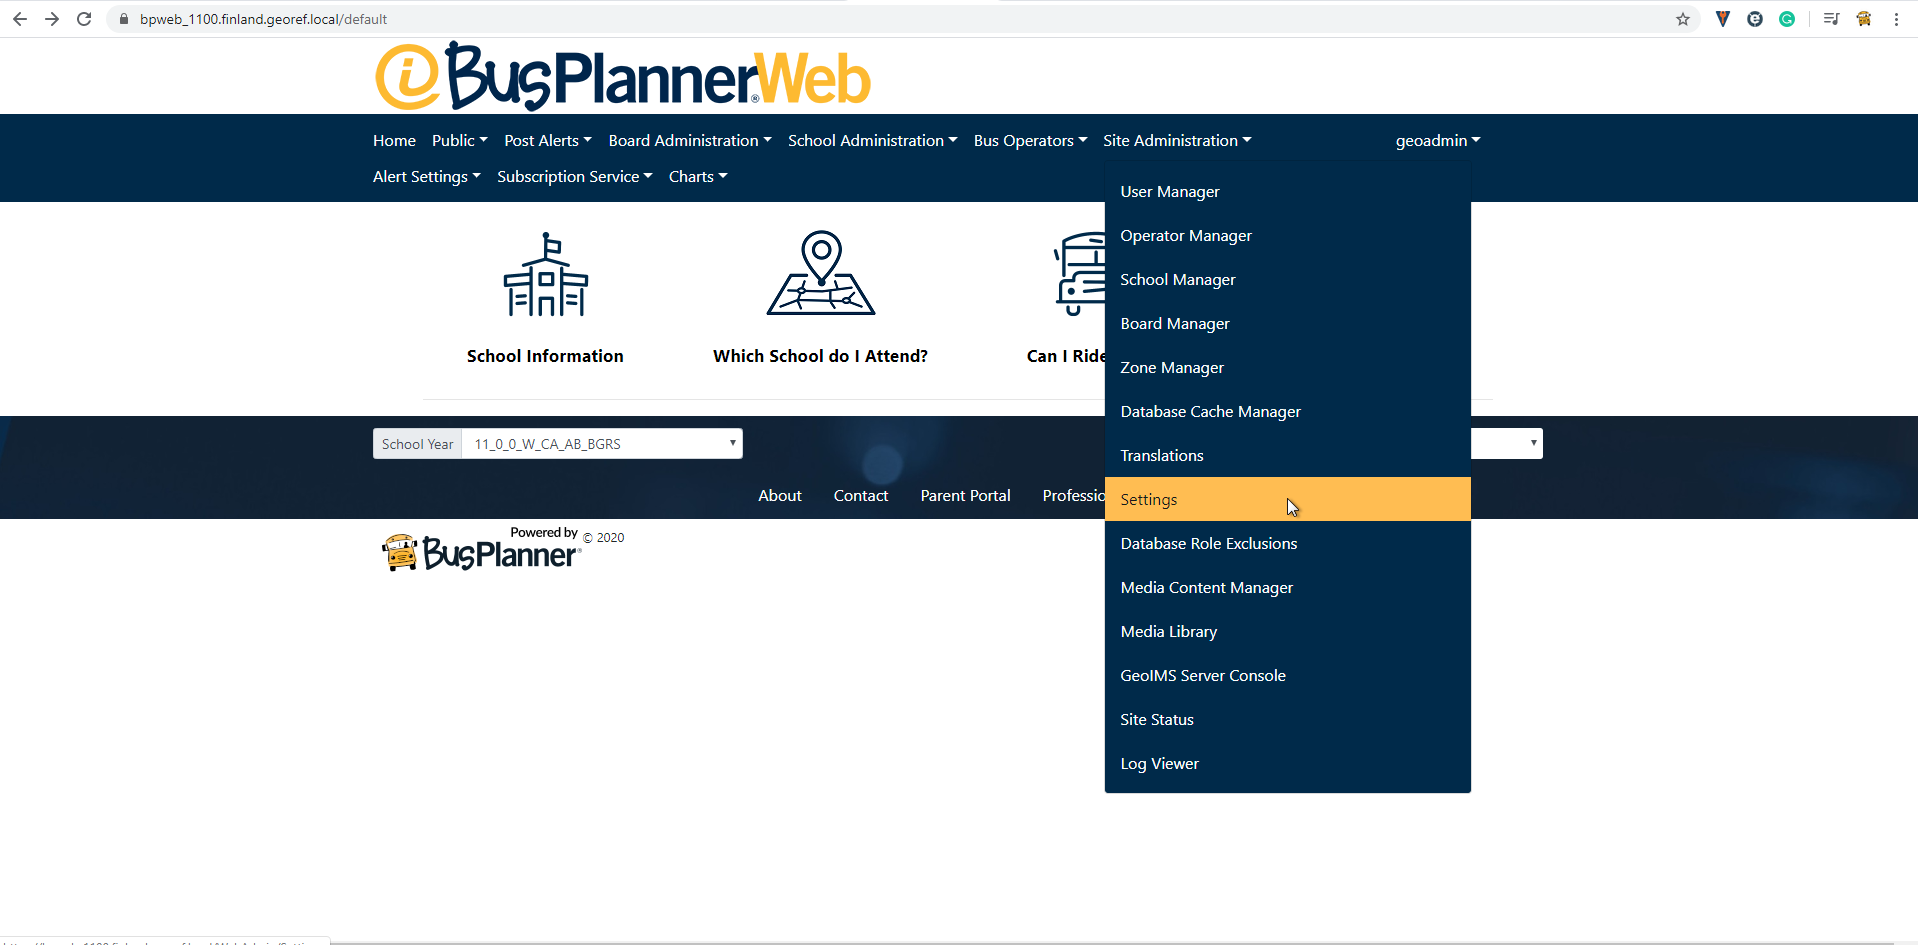
4. Go to Site Administration > Settings

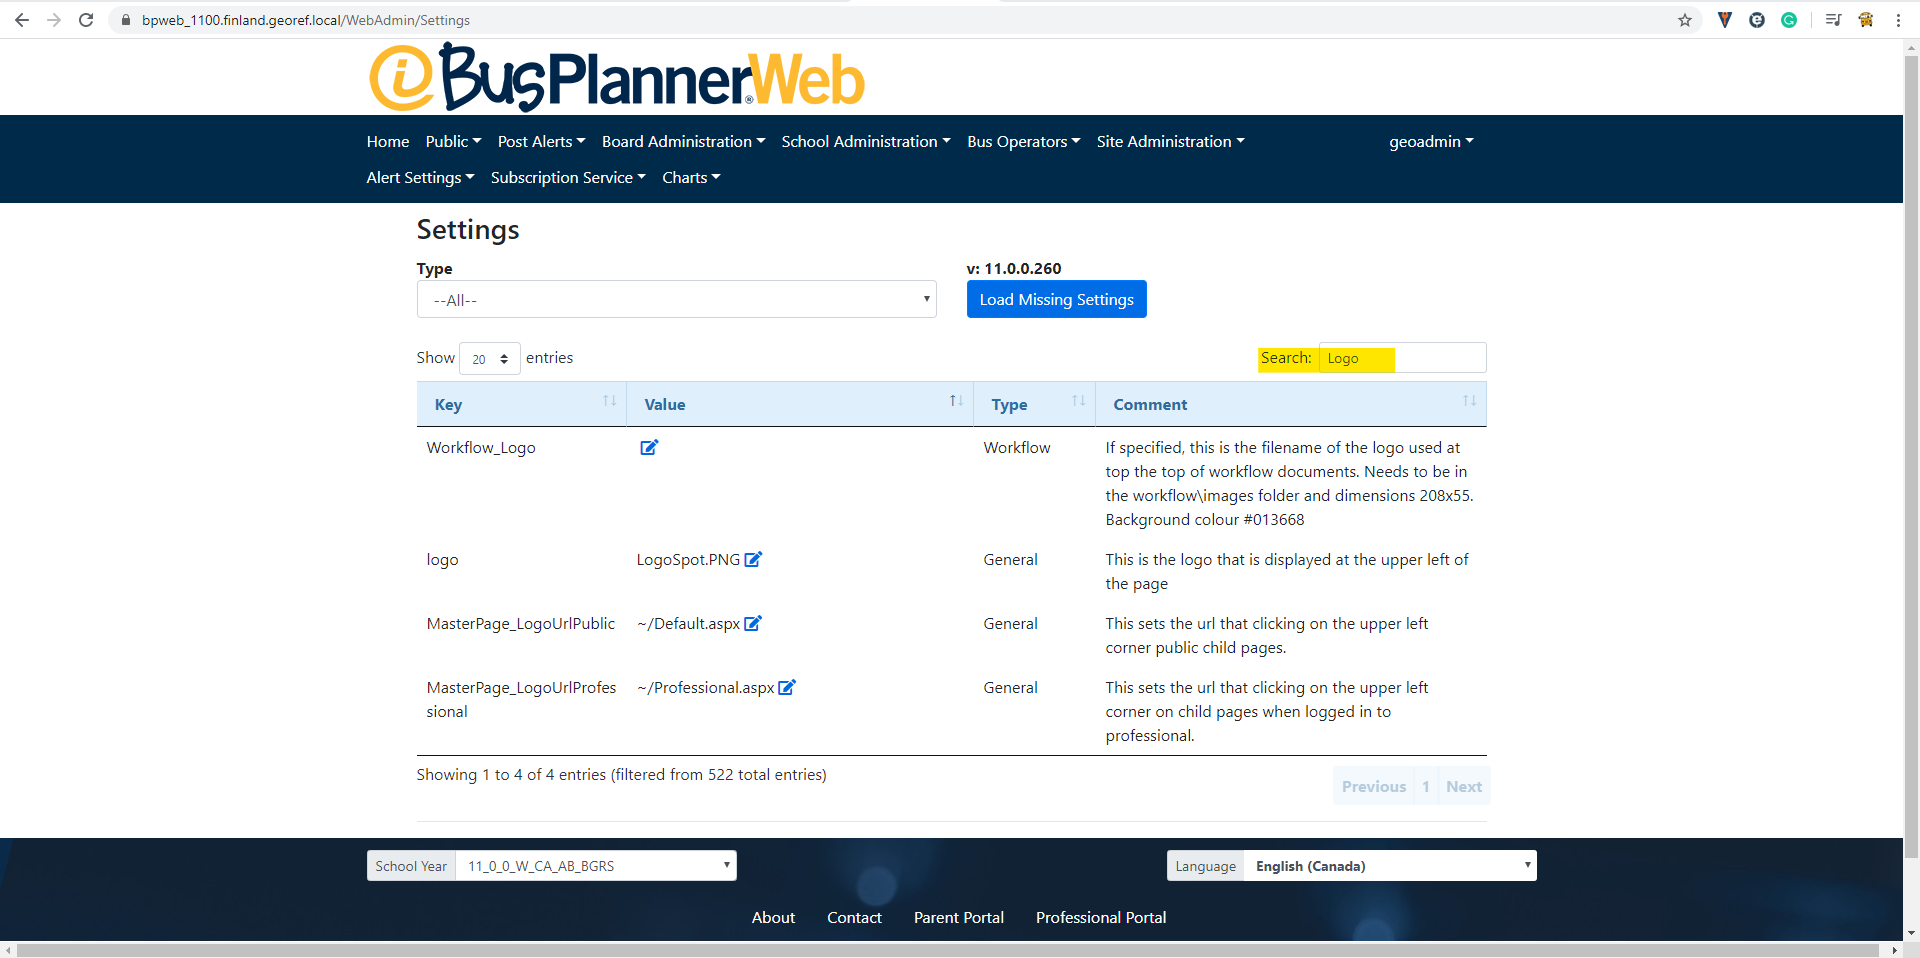
5. In Settings search for Logo

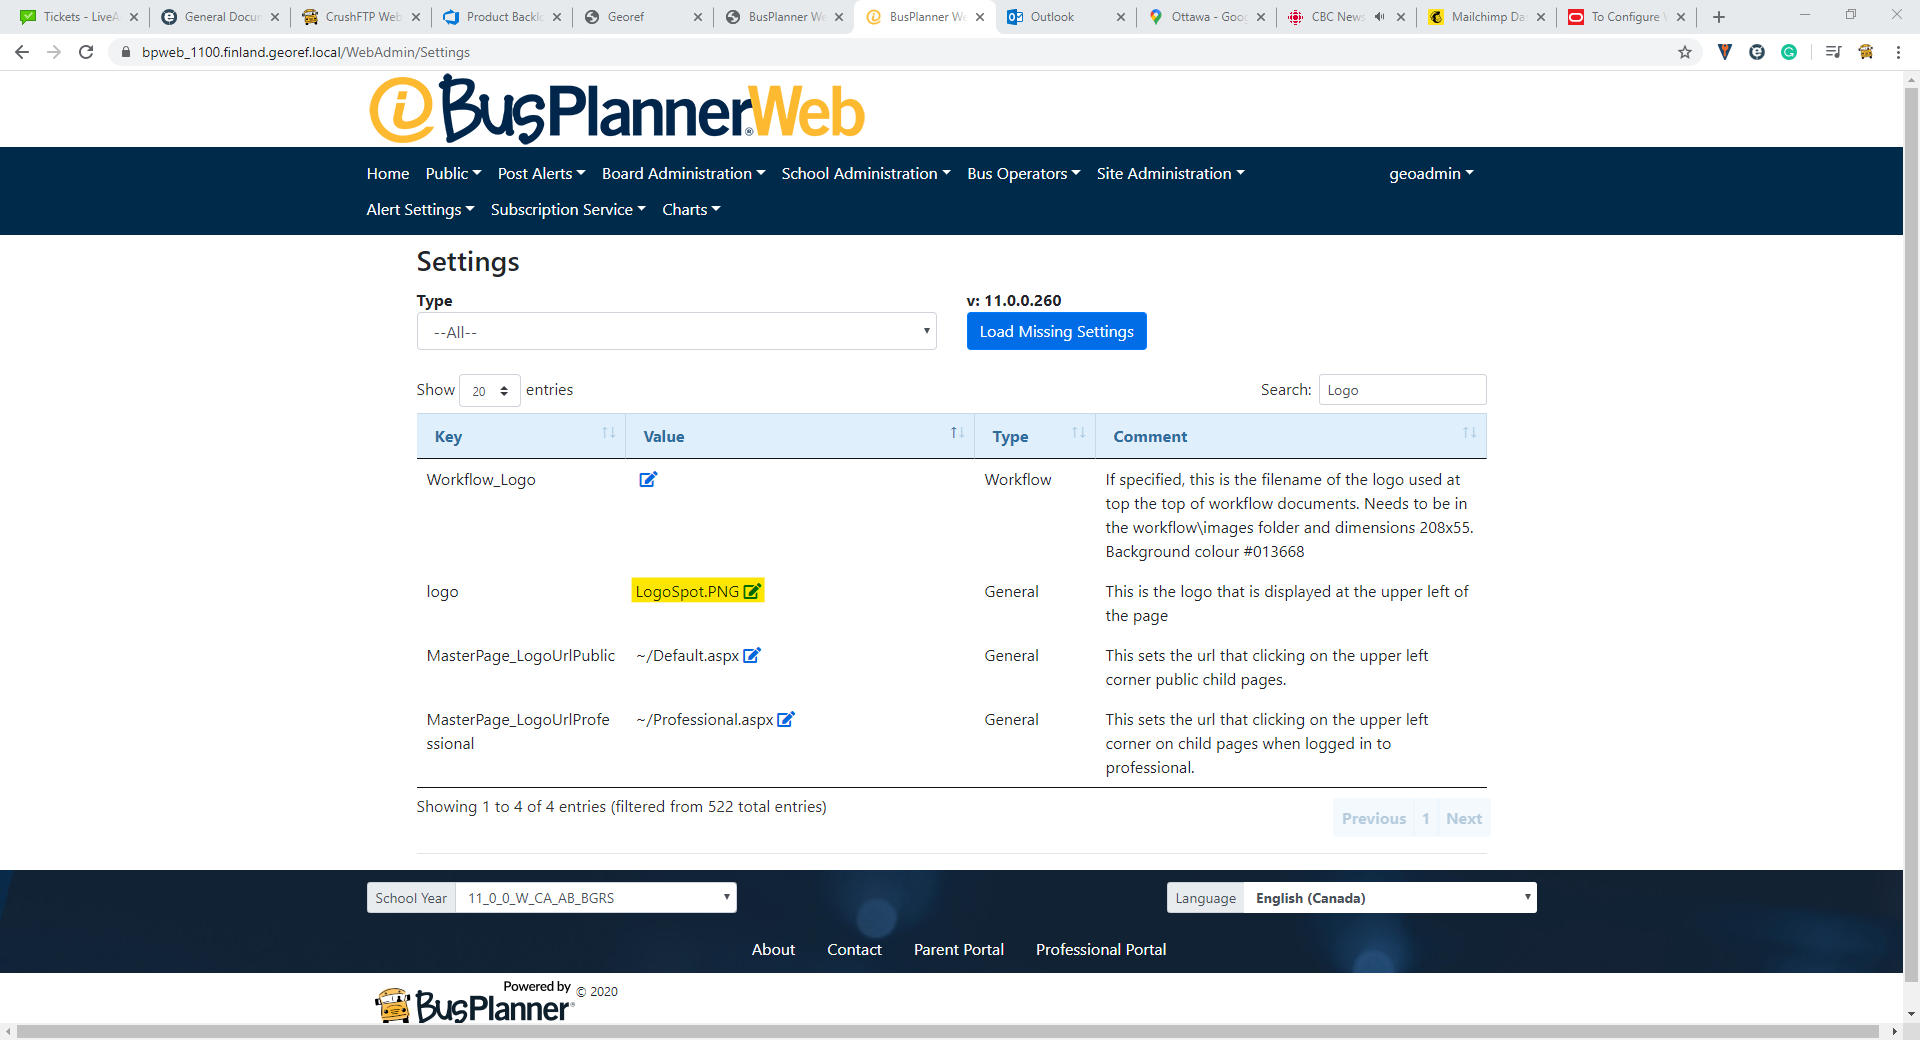
6. In the logo Value settings, change the name to the logo file name you have named.
Note: Do not forget to include the file type in the Value. (ex. LogoSpot.PNG or LogoSpot.JPG)
